
Everything You Need to Cross America on a Bike


When it comes to carefully curated lists, this one kind of takes the cake. It’s literally EVERYTHING one person would need to bikepack across America.
Escape Adventures founder Jared Fisher has crossed the country from different directions multiple times. He’ll be the first to admit that not everything goes smoothly on the first (or second…) try. Imaginative improvisation has gotten him through some tight spots. But now, he’s narrowed the cross country necessities to a concise list of creative essentials in order to bikepack across America.
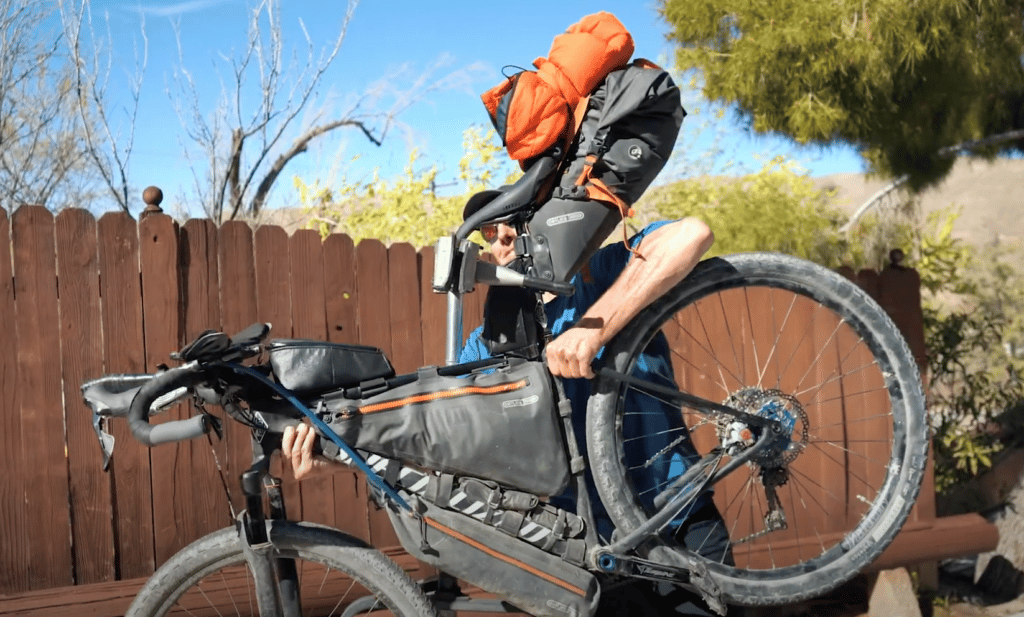
But before diving into what someone would need to bike across America, let’s talk about the bike first! Jared recommends taking 3 to 4 months to get acquainted with your bike and discover its weak points first before taking it out on the open road for days at a time. What’s worked for Jared when riding across America is a Specialized road bike. The TT bars pictured below allow for redistributing weight and stretching out when on long roads. They are double wrapped in foam to keep the hands and arms comfortable.

While it helps to keep the bike as lightweight as possible, don’t skimp out on quality! The goal is to go durable but not overweight, you’ll regret lightweight cheap options. Completely loaded up, Jared’s bike is hefty; 55-60lbs. But he does have it set up for exactly what he needs; down to the details you might not even consider until you’re out in the elements for sometimes weeks at a time.

Jared’s Bike Stats:
- 700 cc wheels
- Hydraulic disc brakes
- 10-42 cassette
- Flat pedals, with pins to hop on and off and walk around with ease
Packing Techniques:
Try to have all the gear behind your body to avoid wind drag. No side packs. When you’re trying to cover 100-150 miles a day, you have to be aerodynamic, so keep it streamlined.

Where the camelbak bladder is placed matters! Jared keeps his attached to the lowest part of his bike to keep that water weight down close to the ground. Then, he just runs the drinking tube up right by his handlebars for easy access to get some sips in while riding.
Bulky items are for the rear of the bike- not for access during the day. Keep your sleeping bag, ground pad, spare tire etc, secured behind you.
To be as efficient as possible, it is important to always think of multiple uses for one item. For example, any extra energy from Jared’s drone camera battery goes towards his phone so that he has access to maps, contacts, and even email, so he can run the company from wherever he may be on the road. Also, that same drone battery keeps his light and rear light charged and ready for the solo nights.

Electronics & Accessories:
- Drone and Drone Battery
- Extra drone battery, Extra drone blades
- Extra memory cards for drone or camera
- Adhesive for GoPro (2 pads)
- Charging cords
- Extra phone mount for bike
- Extra electrical plugs, a wall plug-in to charge everything at once if you do come across a hotel room
- Extra pair of headphones (in case an airpod falls out!)
- Rubber bands: can help keep phone in place in case the mount on the bike breaks, and just plain good to have on hand

Bike Maintenance/Parts:
- The light: Jared uses a NiteRider Lumina 1000 always on the lowest setting (plus 1 back up light, but don’t store it in a vulnerable position, keep it safe and packed away just in case)
- Part tools: go over the entire bike and make sure that the part tools you have are compatible with every bolt. Jared uses a custom tool that is a combination of different part tools so that he has the exact wrench sizes that he needs for his particular bike. It’s all about knowing your machine!
- Chain breaker tool: instead of bringing an entire chain or even spare links, just bring a chain breaker to mend the chain that’s already on your bike
- 3 Extra pairs of brake pads
- Rag for cleaning
- Tubeless patch repair kit
- Spare parts for bag attachments
- Instant patches in case one of your bags gets ripped
- Extra seat clamp (very important)
- Extra derailleur cable
- Small vial of chain oil (size of a bottle of eyedrops)
- Extra buckle for packs
- Tubeless tire sealant
- Extra straps and zip ties to secure anything that breaks
- Spare tire, heavy but it’s worth it! Use gorilla tape to keep it small and compact, tape can also be used later

Personal Items:
- A list of all your supplies, don’t expect your head to keep track of everything!
- Full winter jacket
- Black Diamond Bivy, needs to be waterproof!
- Patch for bivy bag (keep it waterproof)
- Down sleeping bag, light weight
- 3 inch ground pad
- Blow up pillow
- Mittens, not gloves! Rab Endurance Mittens are lightweight and don’t separate your fingers
- Big wool socks (use to protect your drone or camera and other delicate electronics)
- Spare shirt
- Toilet paper
- Business cards! Cuts down on smalltalk
- National park card, saves you $20 if you ever have to pass through national parks (which you most likely will)
- Set of matches
- Chapstick!!!!!
- Bear spray (pepper spray) Jared uses a small can when traveling in black bear country, and a large can where there’s grizzly bears!
- Ibuprofen
- Toothbrush & toothpaste
- Razor
- Hair Comb (if you care about appearances)
Drinking Water necessities:
- 100 oz camelbak
- Extra flow valve for camelbak
- Extra camelbak hose
- Spare spokes specifically cut for your wheels
- Water filter
- Collapsible water bottle, can be easily used in streams to retrieve water that can then be used to refill the camelbak
- Aqua tabs for creek water

Final Advice:
Jared’s advice before anyone attempts such lengthy adventures is this: Use all the space you can but keep it aerodynamic. It’s better to be over-prepared than under-prepared. It’s a bummer to end your expedition early just because you don’t have a warm enough jacket, or not enough underwear, or a part on your bike breaks that you can’t replace or fix. Take the time to break in your bike first and make sure that you are comfortable. Enjoy beautiful scenery all by your own pedaling power. Observe the little things along the way that others will never see in their lifetime.


See you out there!