Using a Dutch oven, you can sauté, simmer, braise, sear, fry, and bake – if you can imagine it, you can make it!
Simmer, boil, steam: On a basic level, a Dutch oven is just a heavy-duty pot with a lid. So any cooking method that can be performed in a typical pot, can be done in a Dutch oven as well. Think simmering soups, steaming rice, boiling water for pasta, etc.
Sear, pan-fry, sautee: A camping Dutch oven is also a great stand-in for a cast-iron skillet. Anything that can be cooked in a cast-iron skillet can be done in a Dutch oven too, like searing steaks, browning chicken thighs, sauteing vegetables, etc. We find the high sides help prevent grease from splattering.
Baking: The real advantage of a camping Dutch oven is its ability to function like… an oven. By placing hot coals on the lid and underneath the body, the interior of the Dutch oven is heated equally. This allows you to bake things like biscuits, scones, and pies.
Braising: Similar to baking, braising requires dual-direction heating as well. Food is cooked in a small amount of liquid which is trapped by the lid of the Dutch oven, creating a moist, “low and slow” cooking environment.
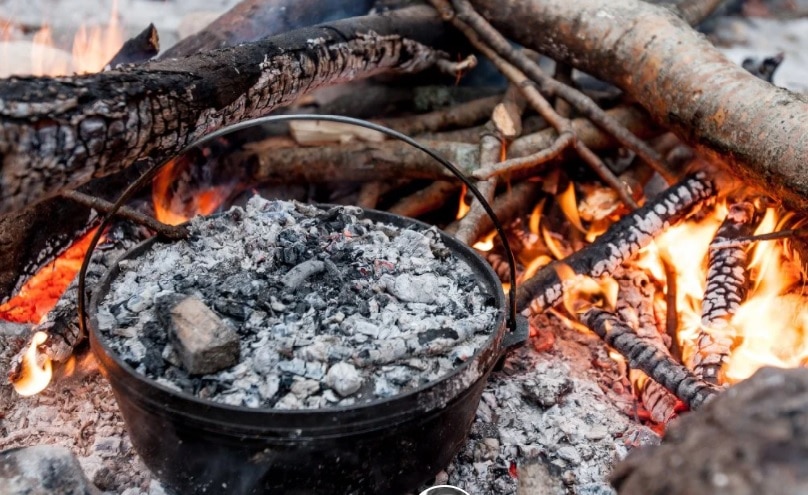
Camping Dutch ovens were primarily designed to use hot coals or wood embers, which are placed underneath the pot and on the lid. This dual-direction form of heating is the only way you can bake or braise with a Dutch oven.
Dutch ovens can also be suspended over a campfire using a tripod, placed on a campfire cooking grate over a fire, or placed directly on top of embers.
Depending on your stove, it is also possible to use a Dutch oven on a camp stove. Our Dutch oven’s legs fit in between the grates covering our camp stove’s range. This is a useful feature when camping in areas with seasonal fire bans.
If you’re using your Dutch oven to bake or braise, you will want heat coming from the top and the bottom. And to do that, you will need to use either charcoal or wood embers.
Charcoal Briquettes: The consistent shape of briquettes make it easier to evenly distribute heat. You can use a temperature chart (see below) to roughly estimate the number of charcoal briquettes you will need on top and bottom to achieve a certain temperature.
Lump Hardwood Charcoal: Less processed than briquettes, lump charcoal is irregularly shaped, making it more challenging to formulaically determine equal heat distribution. While lump charcoal lights faster, we find it doesn’t have the staying power of briquettes. So you may need additional lump charcoal to replace midway to maintain temperature.
Wood Embers: You can also use embers from your campfire to heat your Dutch oven. However, the quality of the embers will be determined by the type of wood you’re burning. Softwoods, like the pine typically sold at campgrounds, produce weak embers that die out quickly. Hardwoods like oak, almond, maple, and citrus produce embers that last much longer.
Most baking in a Dutch oven is done at 350F. For 10″ and 12″ ovens, a quick way to figure out how many charcoal briquettes you will need to achieve this temperature is to double the diameter of your Dutch oven and add one. So, for example, if you have a 10” Dutch oven, you will need about 21 briquettes for 350F.
As for the ratios, you want about ⅓ of the coals on the bottom and ⅔ of the coals on top. So for that example above, you would want 7 coals on bottom and 14 on top.
While this is a good rule of thumb, it is by no means exact. Outside air temperature, type of charcoal, and the volume of the food will all affect the temperature.
By far, the biggest perk of owning a Dutch oven is the ability to bake! It’s so much fun to make fresh bread, pies, and biscuits at a campsite.


 Since 1992, we at Escape Adventures have been blessed to shape and lead adventure travel vacations through some of the most awe-inspiring natural destinations in the world. Each successive season, our passion for adventure grows through memorable moments with our guests. Fresh air, faith, fitness and friends are the building blocks for our ventures, the treasured experiences that keep us moving forward. For those of you who have trekked and traveled with us over the past quarter century, Heather and I express our sincerest gratitude. The memories are priceless.